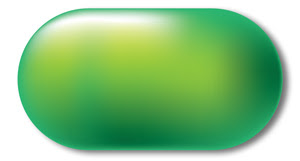
Sometimes you find yourself needing a quick way to accomplish tasks and assume that those methods somehow work the same across applications. I recently ran into a big issue over a small detail that tripped up the quality of my work, and that of others. I needed to turn a rectangle into a capsule or end cap, for lack of a better description. Not an oval, or just a roundly-cornered rectangle, but a shape that ends in a perfect half-circle. Where I currently work, this shape is an essential part of our brand identity.
There is a certain method you can use in QuarkXPress, Adobe InDesign and Adobe Illustrator, combining a circle precisely placed halfway over the end of a rectangle using a Unite or Merge path function, also called Pathfinder in Adobe Land.
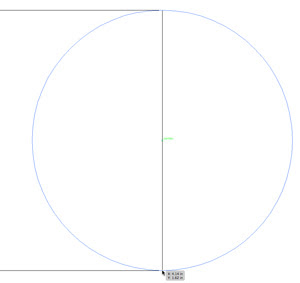 (Some future time, I should explain and demonstrate Pathfinder more thoroughly. It’s the best graphic invention since sliced bread.) If you had the circle placed exactly halfway, you should get a perfectly circular end for the shape, with no doubled anchor points where the rectangle’s end and the half point of the circle overlapped. A look at the anchor points of one example created in Adobe Illustrator shows a proper result with just three anchor points.
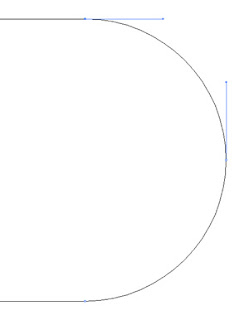
However, I am one to try doing this stunt in less time and with less clicks. That’s my motto! I can create this using just one rectangle.
Here’s how it works in QuarkXPress: Copy the short width of the rectangle, paste it into the corner radius field on the Measurements palette and divide it in half. For example, if a rectangle had a short side of just 6 picas you would enter “6p0/2” into the corner radius field. (This allows you to use a rectangle of any measure; you don’t have to do the math.) Unfortunately, in QuarkXPress, you need to use a short size no more than 4 inches; QuarkXPress’ corner radius is STILL limited to 2 inches.

Anyway, I digress. What is your result? A perfectly circular end cap.
“Now,” I”ll say to myself, “I should be able to do the same thing in other applications. No problem.”
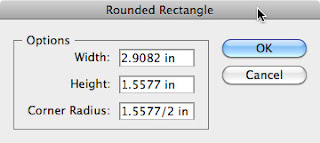
So, I’ll go into Adobe Illustrator. Here’s a slight difference, because Illustrator’s corner radius is not dynamically adjustable. You have to know ahead of time what the radius should be, and that totally depends on you knowing what the short measure of the rectangle will be when you draw it out. Have fun there. But if you have a dimension in mind, you can Option-click with the rounded rectangle tool, and right there enter the half of the short side’s measure for the corner radius (as shown).
Luckily, Adobe Illustrator also has a cool feature in the Effects menu for a square cornered rectangle you already have drawn out. (And it also works on open shapes too, so it’s handy for die lines and such things.) Select the rectangle, copy the short side’s measure from the Options bar, and go to Effects > Illustrator Effects > Stylize > Round Corners. Paste the measure into the radius field, then type “/2” after it. If needed you can expand the appearance of your end cap, but of course it’s not necessary.
What’s next? Adobe InDesign. And here’s where the trouble comes. I expected all these years that Adobe InDesign would act the same way as QuarkXPress and Illustrator. But I recently discovered that NOT to be true.
In previous versions of InDesign, you can use the Corner Options dialog to set it, similar to Adobe Illustrator.
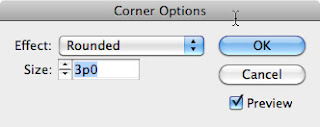 Curious and disappointing is the result you get if you want the perfectly circular end and input half of the short side. Compared to a true circle, you will notice the bulge. It doesn’t even pretend to be circular.
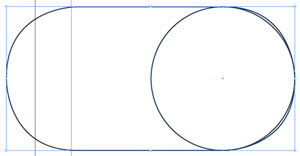
InDesign CS5 now has the ability to dynamically change the corner radius of any rectangle—finally, after 7 versions! However, even that doesn’t help us here. The results are still geometrically out of round.
So in InDesign, we come full circle to using Pathfinder to accomplish this task. Of course, even this beats manually splicing the two shapes together, which, more than 10 years ago, was the only choice for doing this.

No comments:
Post a Comment